
Homecoming is one of the most anticipated events of the school year. It’s a night of dancing, laughter, and making memories that will last a lifetime. While the dress is often the star of the show, your hairstyle is the finishing touch that ties your entire look together. However, getting a professional blowout or an intricate updo at a salon can be expensive and time-consuming.
The good news? You don’t need a professional stylist to look like a million bucks. With a few basic tools—like a curling wand, some bobby pins, and a bit of hairspray—you can achieve a stunning, photo-ready look right in your own bedroom. Whether you’re going for “boho chic,” “vintage glam,” or “sleek and modern,” these 18 easy homecoming hairstyles are designed for every hair type and skill level.
1. Classic Curls

Nothing says “special occasion” quite like classic, voluminous curls. This look is timeless because it works with almost any dress neckline and adds instant glamour. To achieve this at home, start with a heat protectant spray. Use a 1.25-inch curling wand and wrap sections of hair away from your face. Once the curls have cooled, gently run your fingers through them to break them up for a more natural, soft finish. A mist of high-shine hairspray will keep them bouncy all night long.
2. Sleek High Pony

If your dress has a high neckline or intricate back detailing, a sleek high ponytail is the perfect way to show it off. This style is sophisticated, edgy, and surprisingly easy to keep secure while dancing. To get the look, apply a small amount of styling gel or pomade to your roots and brush your hair upward toward the crown. Secure it with a sturdy hair tie. To elevate the look, take a small section of hair from the tail, wrap it around the elastic, and pin it underneath.
3. Dutch Braid Crown

For the girl who loves a romantic, ethereal vibe, the Dutch braid crown is a go-to. It looks incredibly intricate but is essentially just two braids pinned together. Part your hair down the middle and create two Dutch braids (where you cross the strands under instead of over) starting from the front and moving toward the back. Once both sides are finished, wrap the ends around the back of your head and secure them with bobby pins, tucking the ends out of sight.
4. Half-Up Top Knot

The half-up top knot is the perfect balance between casual and formal. It keeps the hair out of your face so you can focus on the dance floor, while still allowing you to show off your length. Simply section off the top third of your hair and twist it into a bun at the top of your head. Secure it with a clear elastic or a cute scrunchie that matches your dress. Curl the bottom section of your hair for added texture and volume.
5. Low Messy Bun

The low messy bun is the “cool girl” staple for homecoming. It’s effortless, elegant, and looks even better as the night goes on and a few more strands fall loose. Start by pulling your hair into a low ponytail. On the last loop of the elastic, don’t pull the hair all the way through. Messily pin the remaining ends around the base. The key to this look is the face-framing pieces; use a curling iron to give those front strands a soft wave.
6. Bubble Ponytail

If you want a style that stands out from the crowd, the bubble ponytail is your best friend. It’s incredibly easy to do but looks like a professional editorial style. Start with a standard ponytail (high or low). Every two to three inches down the tail, place another elastic. Gently pull at the hair between the elastics to create a “bubble” effect. Continue this until you reach the bottom. It’s a great way to add interest to very long hair.
7. Side-Swept Waves

Channel your inner Old Hollywood starlet with side-swept waves. This look is asymmetrical and incredibly flattering for photos. Part your hair deeply on one side and curl your entire head in the same direction. Brush through the curls with a paddle brush to create waves. Sweep all the hair over one shoulder and use two or three bobby pins at the nape of the neck to keep the hair locked in place on the “empty” side.
8. Twisted Halo

The twisted halo is the simpler, faster cousin of the braided crown. It’s perfect if you aren’t confident in your braiding skills. Take a two-inch section of hair from the left side of your face and twist it toward the back, adding a bit more hair as you go. Repeat on the right side. Meet the two twists in the middle and secure them with a small elastic or a decorative clip. It’s simple, sweet, and keeps your hair looking polished.
9. Sleek Low Bun

For a modern, high-fashion look, go for the sleek low bun. This style pairs beautifully with bold makeup or statement earrings. The secret to this look is hair oil or a strong-hold gel. Create a crisp center part and comb your hair back into a tight low ponytail. Twist the ponytail into a neat, compact bun and pin it securely. Finish with a heavy mist of shine spray for that “glass hair” effect.
10. Space Bun Accents

Space buns aren’t just for music festivals; they can be a fun and youthful homecoming look too! For a more formal take, try “accent” space buns. Only use the top section of your hair to create two small buns on either side of your part. Leave the rest of your hair down and straight. It’s a quirky, stylish way to show off your personality and keeps the hair away from your eyes.
11. Fishtail Braid

The fishtail braid looks much more complicated than it actually is. Instead of three strands, you only use two. By crossing small pieces from the outside of one section to the inside of the other, you create a beautiful, intricate weave. For homecoming, pull the braid to the side and “pancake” it—pulling the loops outward—to make it look thick and luxurious. It’s the perfect choice for a boho-themed dance.
12. Headband Tucks

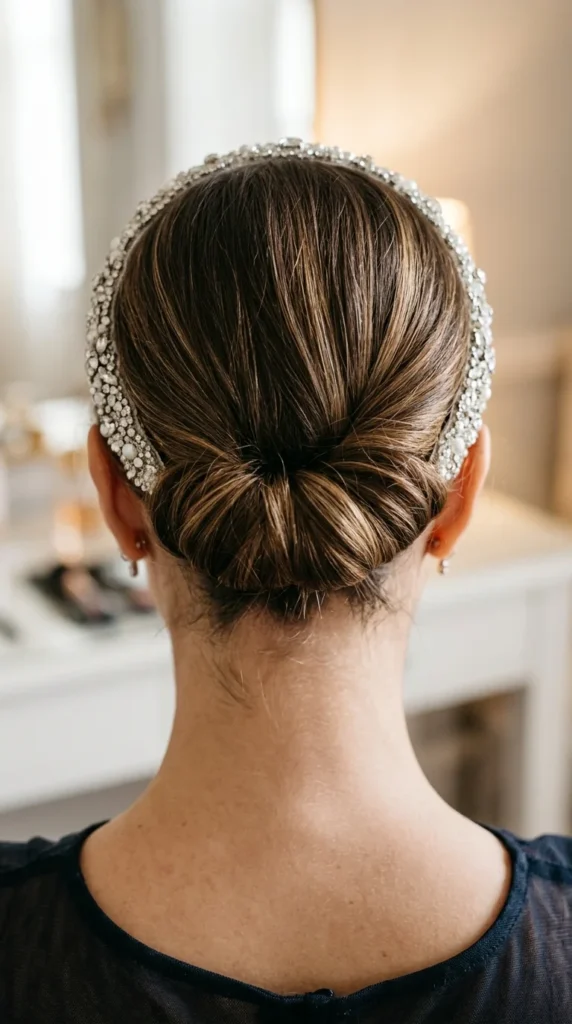
This is perhaps the easiest updo ever invented. Put on a stretchy, decorative headband over the top of your hair (like a crown). Starting from the front, take small sections of hair and tuck them over and under the headband. Continue all the way around until all your hair is tucked in. This creates a beautiful, rolled updo that looks like it took hours but actually takes about five minutes.
13. Hollywood Waves

If you want pure elegance, Hollywood waves are the way to go. To achieve this, curl your hair using a one-inch wand, making sure every single curl is wrapped in the exact same direction. Once the hair is fully cooled, brush it out thoroughly. The curls will begin to “nest” into each other, creating those iconic, uniform S-shaped waves. Use a bit of hair oil to tame any frizz and add a vintage-inspired clip to one side.
14. Waterfall Braid

The waterfall braid is a stunning “half-up” option that showcases the length of your hair while adding a decorative element. It involves a French braid technique where you drop the bottom strand and pick up a new one next to it. This creates the “falling” effect. It’s a great choice if you have highlights, as the braid really makes the different tones in your hair pop.
15. Twisted Low Pony

Elevate a basic low ponytail with a simple twist. Tie your hair into a loose low pony. Create a gap in the hair just above the elastic with your fingers, and loop the ponytail through that gap. This creates a “topsy-tail” effect that hides the elastic and adds a sophisticated twist to an otherwise simple style. It’s quick, secure, and works well for all hair textures.
16. Bow-Tied Half-Up

Accessories are the easiest way to make a DIY hairstyle look professional. A half-up, half-down style is instantly transformed into a “Pinterest-worthy” look with the addition of a large ribbon or bow. You can choose a velvet bow for a classic look or a satin one to match the fabric of your dress. It’s feminine, trendy, and incredibly easy to execute.
17. Scarf Braids

For a pop of color and a unique texture, incorporate a silk scarf into your braid. Simply tie the scarf to the center strand of hair before you start braiding and treat the two ends of the scarf as part of your hair strands. This adds bulk to thinner hair and gives your homecoming look a chic, European-inspired flair that is sure to get compliments.
18. Braided Headband

You don’t need to buy a headband when you can make one out of your own hair! Take a small section of hair from underneath, near your ear, and braid it all the way to the end. Wrap it over the top of your head and secure it behind the opposite ear with a bobby pin. This “natural” headband keeps your hair out of your face and adds a touch of bohemian charm to loose waves or a straight blowout.